Managed Kubernetes is no longer just about running containers; it is the backbone of the "AI-first" enterprise. In 2026, Google Kubernetes Engine (GKE) has evolved into a sophisticated orchestration layer that integrates Agentic AI, Carbon-Aware Scheduling, and Autonomous SRE tools.
GKE has moved beyond infrastructure management to become an "AI Hypercomputer" platform. In this era, your Kubernetes Cluster serves as a specialized environment capable of orchestrating thousands of ephemeral Agent Sandboxes with sub-second latency, thanks to the 2026 rollout of GKE Pod Snapshots. This allows AI agents to checkpoint and restore their state instantly, reducing model cold-start times by up to 90%.
Furthermore, sustainability is now a first-class citizen in the control plane. With Carbon-Aware Scheduling, GKE dynamically aligns resource-intensive batch jobs with real-time green energy signals, automatically shifting workloads to regions with the highest Carbon-Free Energy (CFE) percentage. Operational toil is simultaneously addressed by Gemini-powered Autonomous SRE tools that perform predictive root-cause analysis and self-healing, allowing your team to focus on strategic innovation rather than manual fire-fighting.
What is a Kubernetes Cluster in 2026?
A Kubernetes Cluster in 2026 is an AI-native ecosystem. Beyond basic orchestration, GKE now serves as a high-performance "AI Hypercomputer." Whether you are running traditional web apps or decentralized AI agents, the platform now automates the most complex parts of the infrastructure lifecycle through autonomous operations and hardware-aware scheduling.
Key 2026 Innovations in GKE:
- Agentic AI Workload Profiles: GKE now features Agent Sandbox, a new Kubernetes primitive designed for the "agentic" era. It provides kernel-level isolation (via gVisor or Kata Containers) for non-deterministic AI agents. When combined with GKE Pod Snapshots, it reduces model cold-starts by up to 90%, allowing 70B parameter models to restore from a memory snapshot and begin inference in seconds.
- Carbon-Aware Scheduling: Integrated directly into the GKE control plane, the scheduler now utilizes real-time Carbon-Free Energy (CFE%) signals. It can automatically shift non-critical batch workloads to cleaner regions or time slots, potentially reducing operational CO2 emissions by up to 30% without performance impact.
- Gemini Cloud Assist (Autonomous SRE): This built-in AI assistant acts as a 24/7 SRE partner. It performs real-time root cause analysis, summarizes complex logs into plain prose, and offers "One-Click Remediation" for cluster anomalies. It can even predictively scale your cluster before a traffic spike based on historical patterns.
- In-place Pod Resizing (GA): A major milestone in Kubernetes 1.35, this feature allows you to modify CPU and Memory requests/limits on the fly without restarting the container. This is essential for 2026 workloads that require dynamic resource inflation (like JIT compilation or AI inference spikes) without dropping connections.
- Auto IPAM & NodeLocal DNSCache: Standard clusters now default to NodeLocal DNSCache for sub-millisecond lookups. Additionally, Auto IPAM dynamically manages subnets, eliminating "IP exhaustion" errors as your cluster scales into the thousands of nodes.
Prerequisites
To leverage these 2026 features, make sure you have:
- Sustainability Metrics Enabled: Access the Google Cloud Sustainability dashboard to view real-time carbon data for your Kubernetes Cluster locations.
- Kubernetes Engine API Active: Ensure your project is configured for the 2026 GKE API version.
- FinOps Hub 2.0 & Billing: GKE now requires the FinOps Hub 2.0 for AI-powered cost forecasting. This tool provides predictive intelligence to move your budget planning from guesswork to data-driven control.
Step 0: Install gcloud CLI (Optional but recommended)
If you want to connect to GKE from your local terminal:
- Download and install the gcloud CLI:
2. Initialize the CLI
3. Install kubectl:
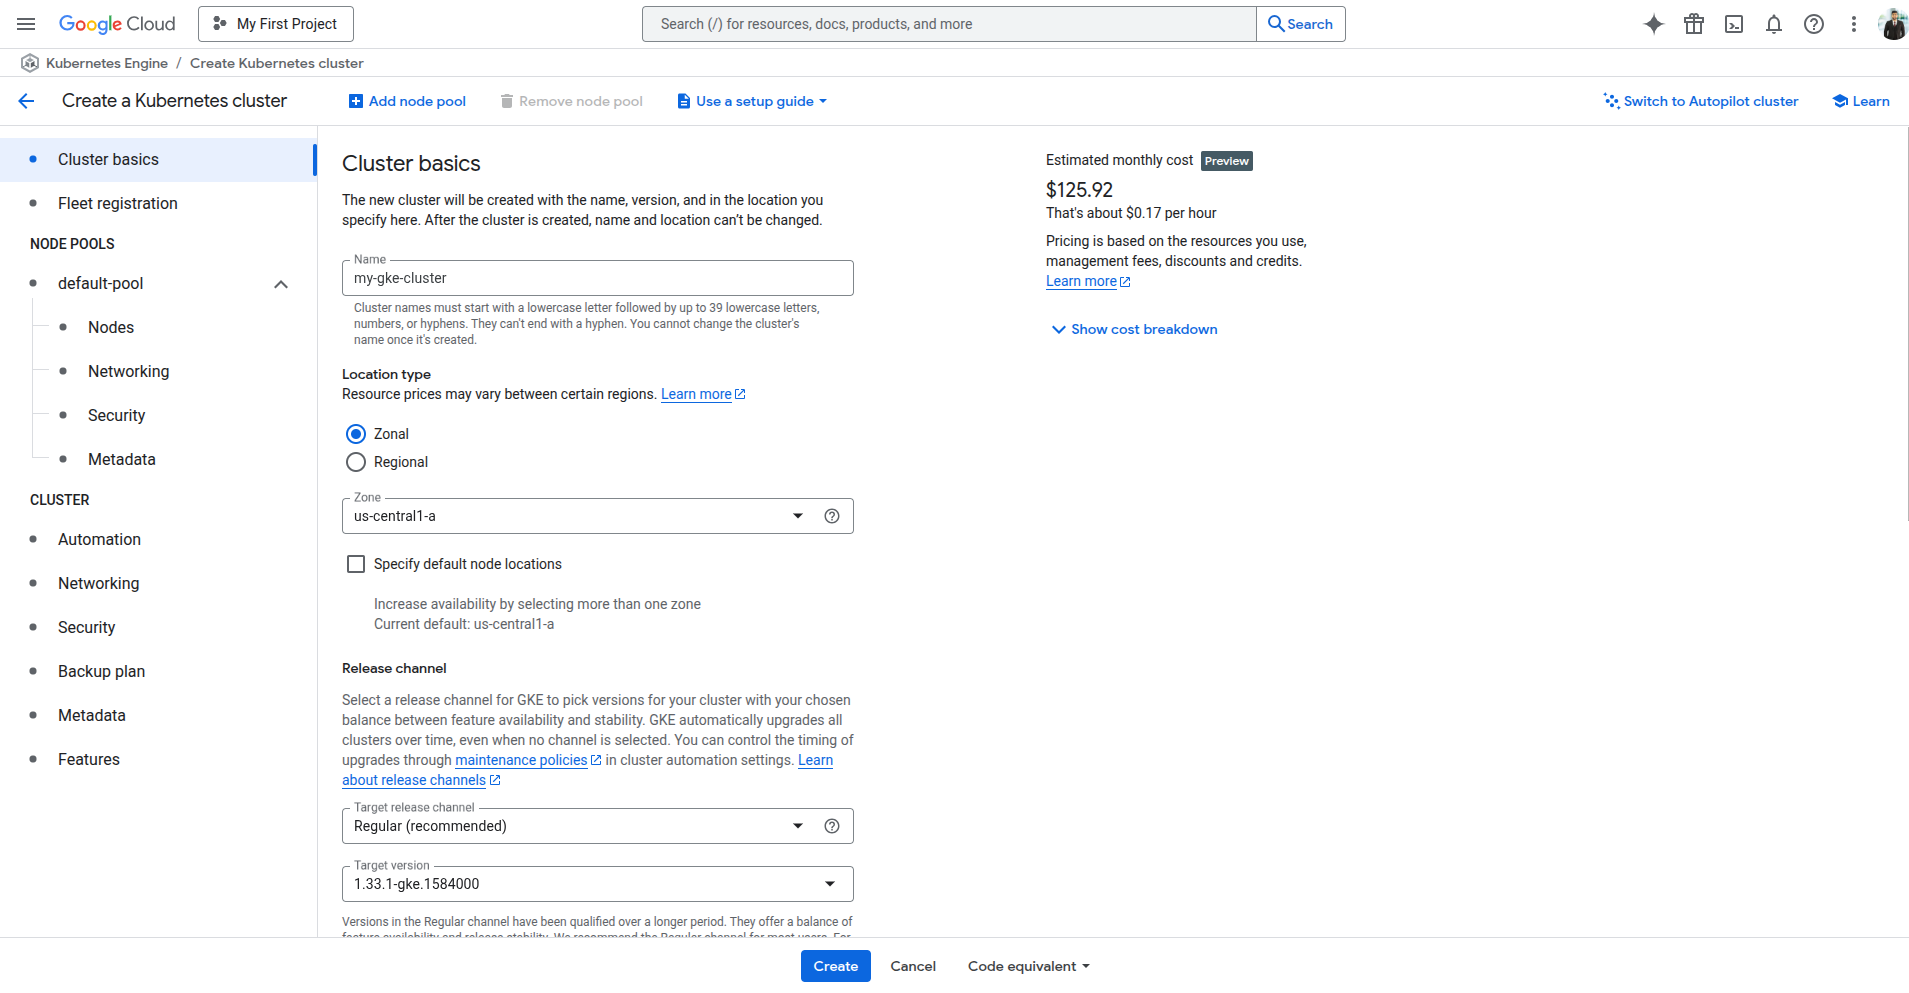
Step 1: Create a GKE Cluster (Console UI)
Go to: GCP Console > Kubernetes Engine > Clusters
Click “Create Cluster”, and choose:
- Mode: Standard
- Cluster Basics:
- Name: my-gke-cluster
- Location type: Zonal
- Zone: us-central1-a
- Release Channel: Regular (recommended)

Step 2: Configure Default Node Pool
Under default-pool, configure:
- Nodes: 2
- Machine Type: e2-medium
- OS Image: Ubuntu
- Disk Size: 20 GB
Optional: Enable Autoscaler
- Enable cluster autoscaler
- Min nodes: 2
- Max nodes: 4
- Location policy: Any
- Size limit type: Total limits
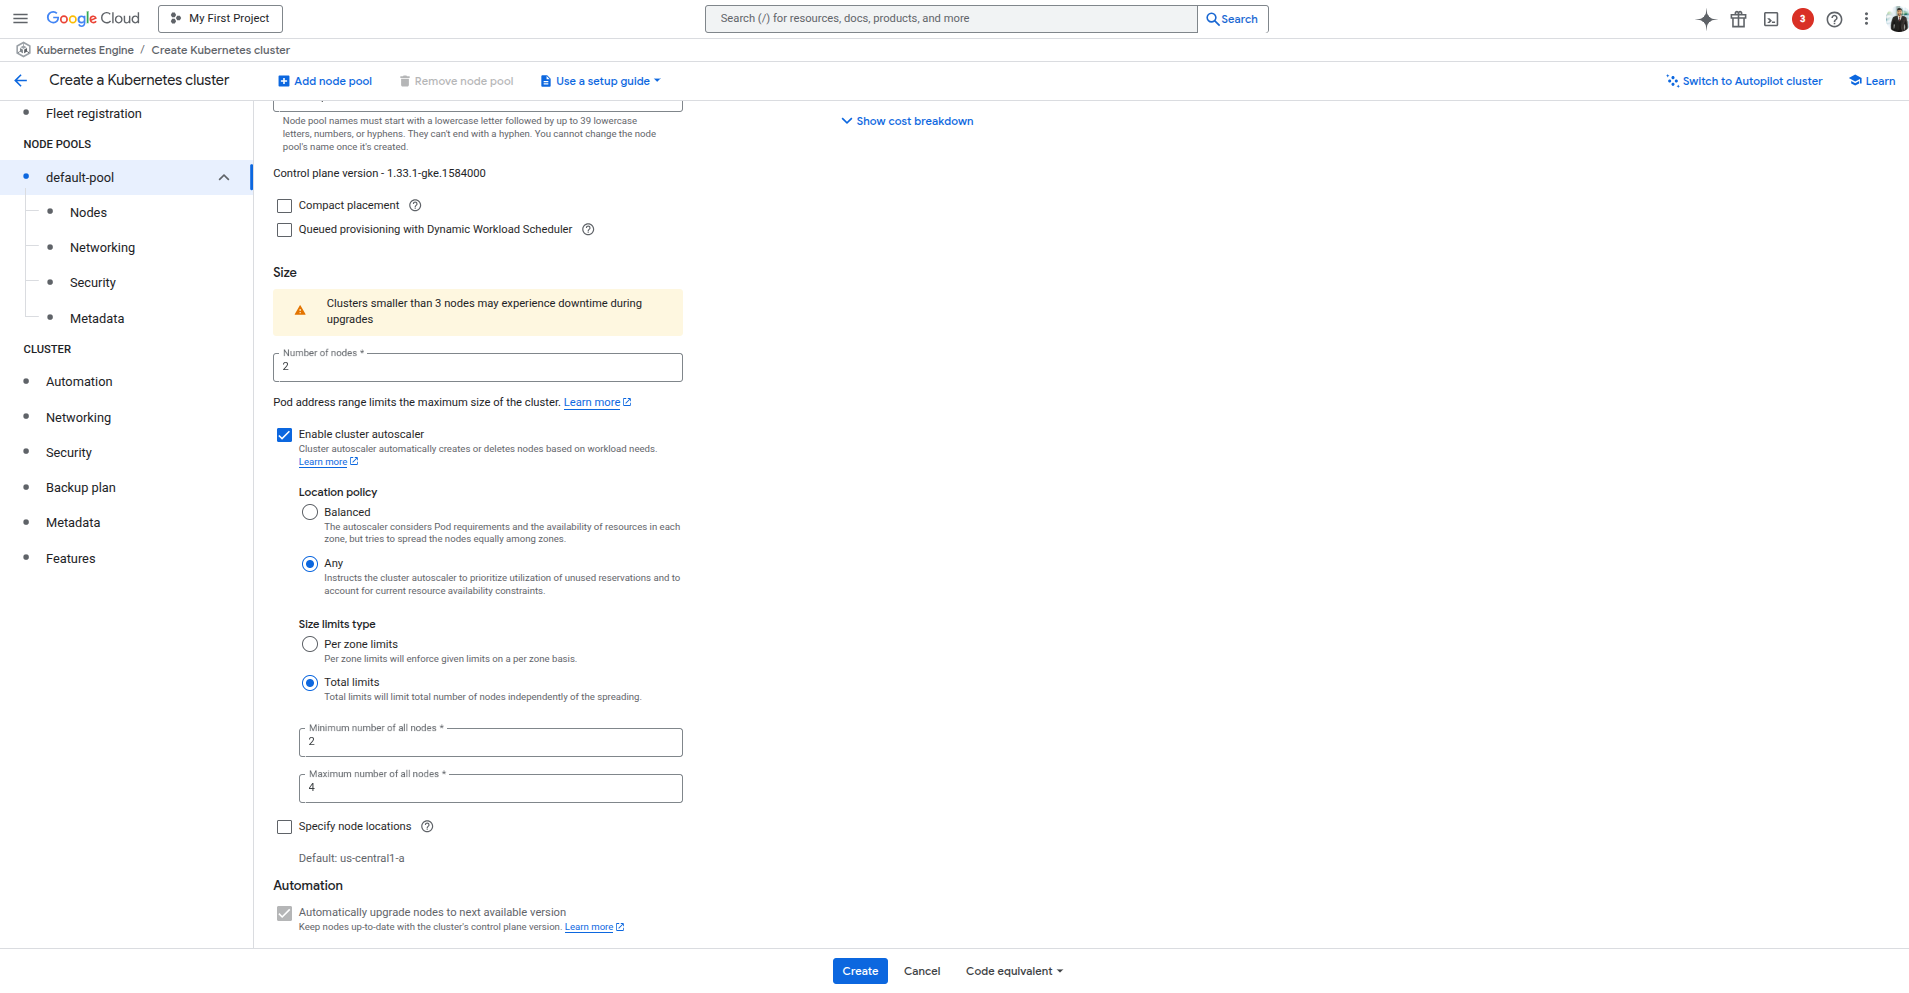
Autoscaling lets your cluster grow/shrink based on workload.
Step 3: Networking Configuration
- Use the default VPC You may also use a private custom VPC based on your security needs.
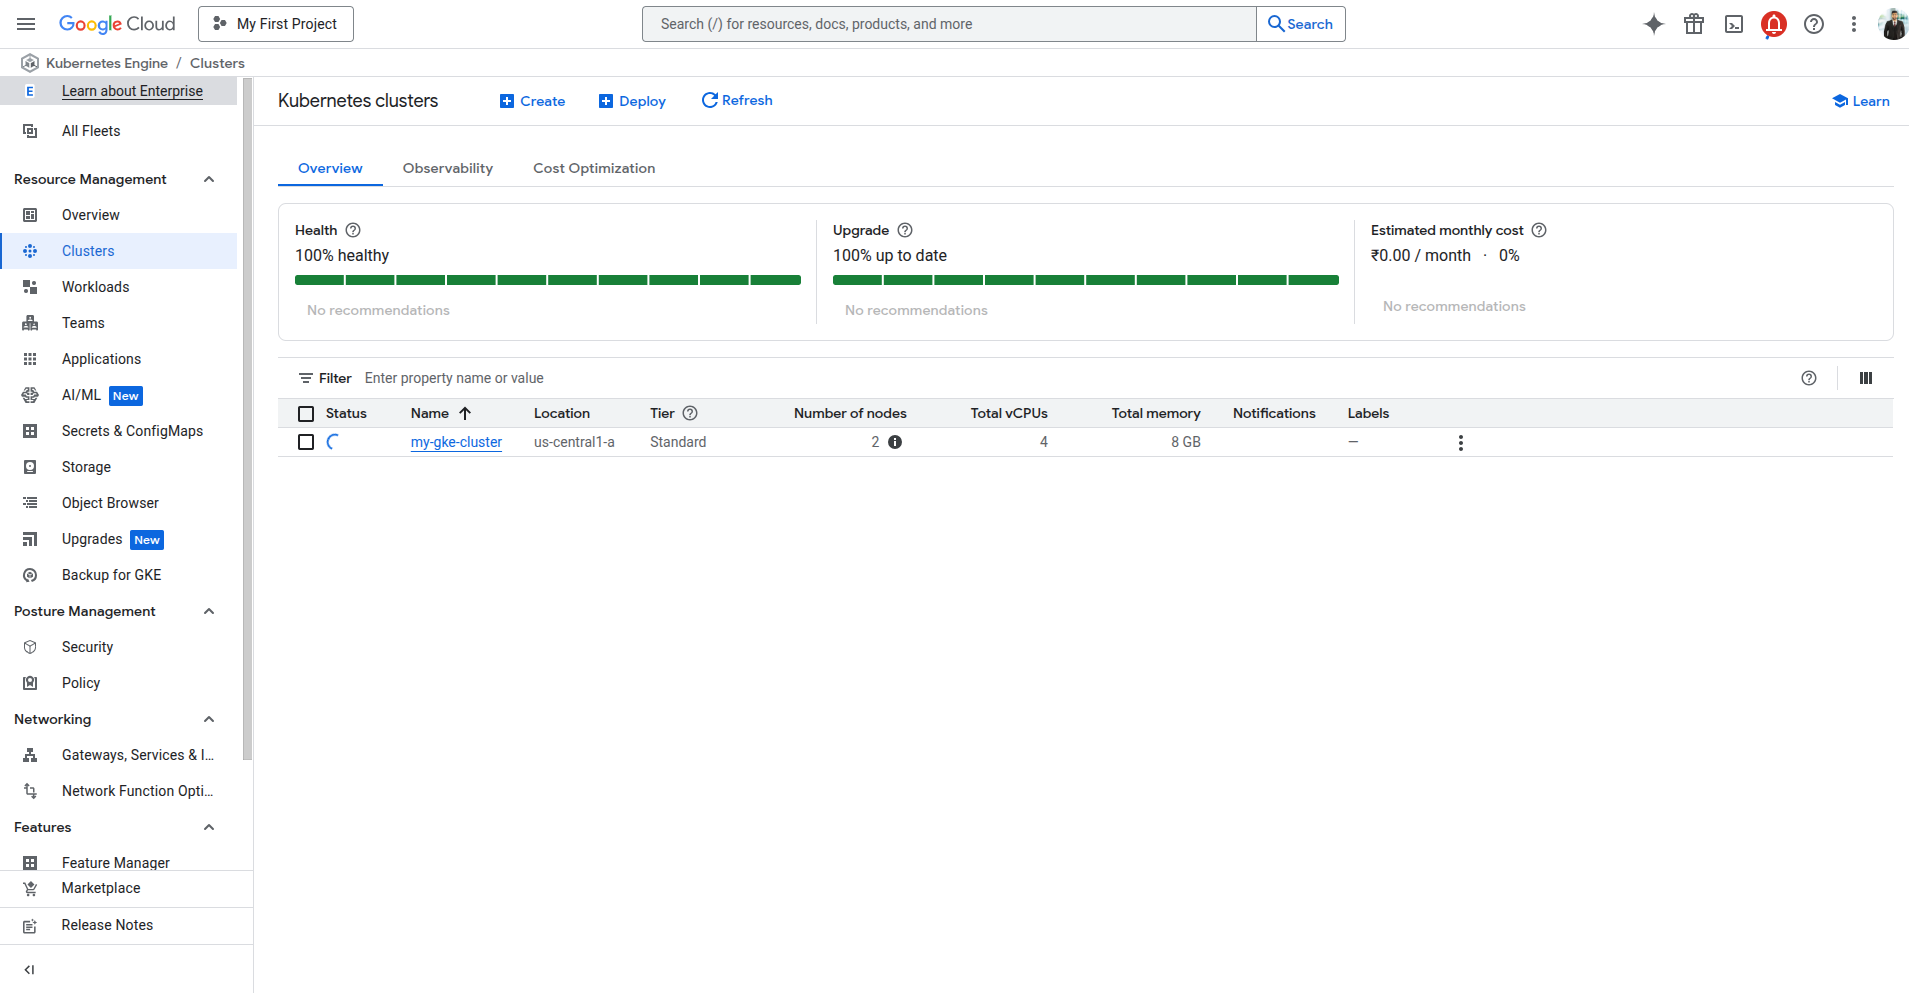
Step 4: Click “Create”
Once all settings are done, click Create and wait ~3–5 minutes.
Step 5: Connect to the Cluster
You can either use Cloud Shell or your local terminal (with gcloud installed).
Using Cloud Shell
Click “Connect” on your cluster → Copy the gcloud command and run in Cloud Shell.
Using Local CLI
Step 6: Deploy NGINX to GKE
1. Create the deployment
2. Expose with LoadBalancer
Step 7: Access Your App
To get the external IP:
Wait until the EXTERNAL-IP field shows a public IP (may take 1–2 mins). Open that IP in your browser, and you should see the NGINX Welcome Page.
Conclusion
Deploying a Kubernetes Cluster on GCP in 2026 is no longer a mere exercise in infrastructure setup; it is the strategic foundation for building and scaling autonomous, sustainable, and highly efficient digital ecosystems. By integrating Agentic AI profiles, leveraging Carbon-Aware Scheduling, and utilizing Gemini-powered self-healing tools, organizations can transform their GKE environment from a simple container orchestrator into a high-performance "AI Hypercomputer." This guide has walked you through the technical steps from the initial gcloud configuration to deploying your first NGINX workload, ensuring your cluster is ready to handle the dynamic demands of the next generation of AI-first applications.
As infrastructure complexity grows with these 2026 innovations, many organizations find that managing such sophisticated environments requires specialized expertise. To ensure your clusters are optimized for both performance and cost-efficiency, you may want to Hire DevOps Engineers who specialize in the latest GKE primitives and autonomous SRE workflows. Whether you are looking to migrate legacy workloads or architect a decentralized AI agent network, professional guidance can bridge the gap between deployment and operational excellence.
Ready to scale your infrastructure or need a custom technical roadmap? Explore how our experts can accelerate your cloud journey, and Contact Zignuts to start your free consultation today.

Divyesh Lagadhir
A dedicated architect of robust, scalable, and secure infrastructure solutions that bridge the gap between development and operations.