Setting up a robust database infrastructure is a rite of passage for growing applications. MySQL Replication serves as the backbone for this journey, enabling data to flow seamlessly from a primary source to one or more destinations. By mirroring your data in real-time, you transform a single point of failure into a resilient, distributed system that can handle the demands of modern web traffic.
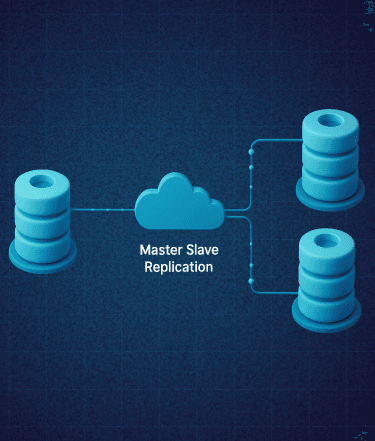
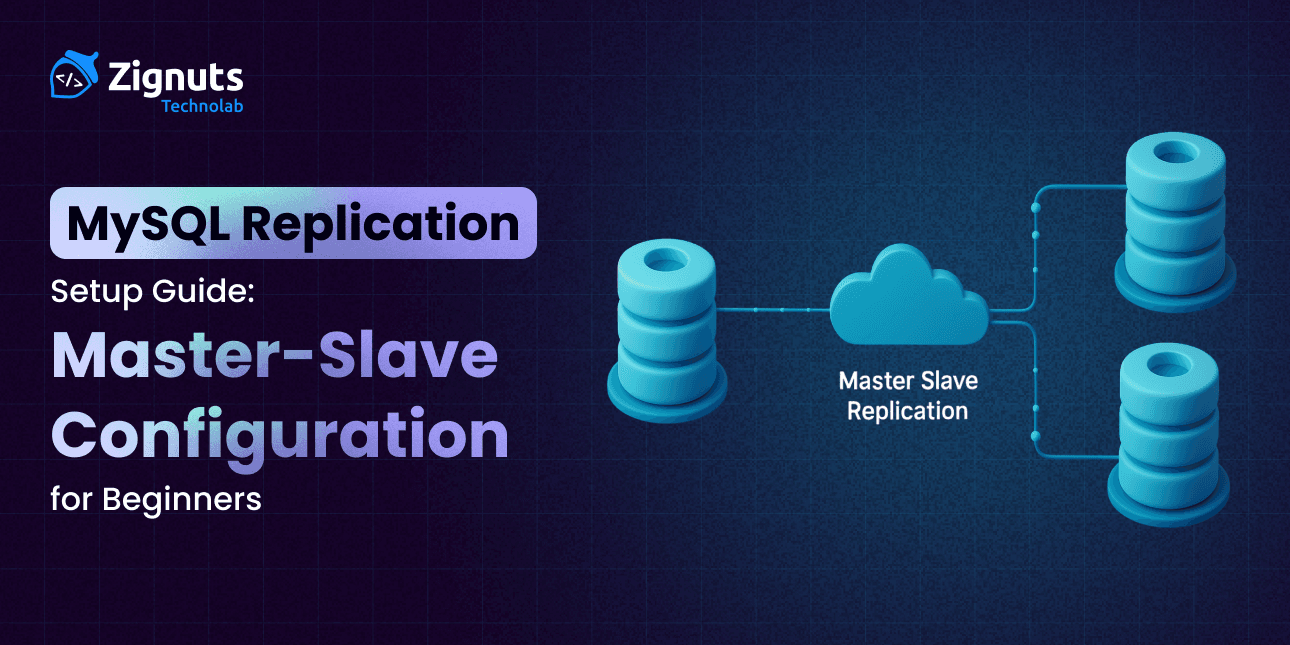
At its core, this process involves the primary server (the Master) recording all schema and data changes into binary logs, which are then transmitted across the network to secondary servers (the Slaves). These Slaves execute the logs locally, ensuring they stay synchronized with the Master. This decoupling of data tasks allows for a "divide and conquer" approach to database management: the Master handles the heavy lifting of data entry and updates, while the Slaves provide a lightning-fast response layer for user queries.
Whether you are looking to protect your data against hardware failure, simplify your backup strategy without locking tables, or need to speed up your application by offloading heavy read traffic, mastering this configuration is a vital skill for any developer or system administrator. By the end of this guide, you will have a clear, functional pathway to building a high-availability environment that grows alongside your user base.
Why Use MySQL Replication?
Understanding the "why" is just as important as the "how." Transitioning to a multi-server architecture offers several architectural advantages that go beyond simple data copying. By implementing MySQL Replication, you effectively move from a fragile, single-point-of-failure setup to a sophisticated, distributed network designed for durability.
Horizontal Scalability:
As your user base grows, a single server eventually hits a performance ceiling. With replication, you can direct all write operations (INSERT, UPDATE, DELETE) to the master while distributing heavy read operations (SELECT) across multiple slaves. This load-balancing act prevents any single server from becoming a bottleneck, allowing your application to handle thousands of concurrent users with ease.
Data Redundancy & High Availability:
It acts as a live safety net and a core component of a Disaster Recovery (DR) plan. If the primary server suffers a hardware failure or a corrupted filesystem, your slaves contain a near-instantaneous copy of the data. This allows you to promote a slave to "master" status quickly, minimizing potential downtime and ensuring business continuity.
Analytical Offloading:
Complex reporting, BI (Business Intelligence) tools, and data mining queries can be incredibly resource-intensive, often locking tables or spiking CPU usage. By running these heavy analytics on a dedicated slave, you ensure the production environment on the master remains fast and responsive for your end-users.
Zero-Downtime Backups:
Traditional backups can sometimes slow down a live database. With a replication setup, you can pause the replication process on a slave, take a consistent snapshot or dump of the data without any pressure on the master, and then resume. This ensures your live application never experiences a "hiccup" during maintenance windows.
Geographic Distribution:
For global applications, placing slaves in different geographic regions can reduce latency. Users can read data from a server physically closer to them, significantly improving the perceived speed of your digital product.
Prerequisites
Before we begin the technical implementation of MySQL Replication, ensure your environment meets these essential requirements. Proper preparation is the key to avoiding synchronization errors later in the process. You need a stable network environment where the two servers can maintain a constant "heartbeat" connection.
- Two Distinct MySQL Instances: You should have two separate environments ready. These can be cloud-based instances (like AWS EC2 or DigitalOcean Droplets), local Virtual Machines, Docker containers, or physical hardware.
- Version Compatibility: Ensure you have MySQL version 5.7 or higher installed on both nodes. It is highly recommended that both servers run the exact same version to prevent syntax errors or incompatible log formats. If versions must differ, the slave should ideally run a higher version than the master.
- System Access: You must have SSH access and terminal privileges with sudo or root permissions. This is necessary to modify system configuration files and restart the database service.
- Network Connectivity & Security: The servers must be able to communicate over the network. Specifically, port 3306 (the default MySQL port) must be open on the master’s firewall to allow the slave to connect. If you are using a cloud provider, remember to update your Security Groups or UFW rules.
- Data Consistency: For an existing database, ensure you have a "point-in-time" snapshot strategy. You will need to briefly lock the master or use a consistent backup tool to ensure the slave starts with a perfect mirror of the source data.
- Storage Space: Ensure the slave has enough disk space to hold the entire dataset plus the relay logs that will be generated during the synchronization process.
Network Mapping for this guide:
To make the commands easier to follow, we will use the following placeholder IP addresses. Please replace these with your actual server IPs during the setup.
- Master IP: 192.168.1.100 (The primary source where writes occur)
- Slave IP: 192.168.1.101 (The secondary node where data is replicated)
Hire MySQL Developers Today!

Step 1: Configure the Master Server
The master server acts as the primary authority and the source of truth for your entire cluster. To enable MySQL Replication, we must transform the master from a standalone instance into a broadcast node. This involves configuring it to meticulously record every data modification, whether it is a table creation or a row update, into a sequential binary log. The slave will later connect to this log to keep itself in perfect sync.
1.1 Edit MySQL Configuration
Your first task is to modify the MySQL daemon settings to enable unique identification and logging. Access your configuration file (typically found at /etc/mysql/mysql.conf.d/mysqld.cnf or /etc/my.cnf) and insert the following parameters under the [mysqld] section:
- server-id: This is a mandatory field. It provides a unique identity for the server within the replication topology. In a standard setup, the master is usually assigned '1'.
- log_bin: This defines the path for the binary log files. These logs are the "ledger" of the database; without them, the slave has no way of knowing what changed on the master.
- binlog_do_db: This setting acts as a filter. By specifying your database name here, you tell MySQL to only log changes for this specific schema, which helps keep the log files clean and reduces unnecessary network traffic.
Once you have saved the file, apply the changes by restarting the MySQL service:
1.2 Create Replication User
For security reasons, the slave should never connect using the 'root' user. Instead, we create a dedicated account with restricted permissions specifically for the replication process. Log into your MySQL shell and execute the following:
By using the REPLICATION SLAVE privilege, you are granting the slave the minimum level of access required to read the binary logs. Note that '%' allows the slave to connect from any IP, but for tighter security, you could replace this with the specific IP of your slave server.
1.3 Get Master Status
To ensure a seamless handoff, the slave needs to know the exact "coordinates" of the master’s binary log at the moment the data snapshot is taken. This prevents the slave from missing updates or trying to duplicate old data.
Crucial: When you run SHOW MASTER STATUS, you will see a table. Carefully record the values under the File (e.g., mysql-bin.000001) and Position (e.g., 405) columns.
Important Note: Do not close this terminal session! Keeping this window open maintains the read lock, ensuring that no new data is written while you perform the database export in the next step.
1.4 Dump the Database
Now, we capture the current state of your data. Open a new terminal window to perform the export using the mysqldump utility. This creates a SQL file that will serve as the foundation for your slave server.
Once the dump is complete, transfer the file securely to the slave server using the scp command:
With the data safely exported and transferred, you can now return to your original Master MySQL terminal and release the database so it can resume normal operations:
Step 2: Configure the Slave Server
With the master server broadcasting its changes, we now turn our attention to the slave. This server acts as a loyal recipient that constantly watches the master's binary logs and applies those same changes to its own local datasets. Setting up the slave correctly is essential for maintaining data integrity and ensuring that the MySQL Replication remains in a healthy, synchronized state.
2.1 Edit MySQL Configuration
Just like the master, the slave needs a unique identity. If two servers share the same ID, the replication stream will fail. Open your MySQL configuration file on the Slave server (e.g., /etc/mysql/mysql.conf.d/mysqld.cnf) and add the following:
While not strictly required for basic setups, some administrators also enable read_only = 1 on the slave to prevent accidental data entry that didn't come from the master. After saving the file, restart the service to initialize the new identity:
2.2 Import the Database
Before the slave can start following new updates, it must have the same historical data as the master. We do this by importing the SQL dump we transferred earlier. This provides the "baseline" data for the slave.
Depending on the size of your database, this process may take some time. Once completed, the slave’s database_name will be an exact replica of the master’s database at the moment the lock was applied.
2.3 Configure Replication
Now we must tell the slave exactly where to find its master and which part of the "ledger" (binary log) to start reading from. This is where you use the File and Position values you recorded in Step 1.3.
This command establishes the handshake. The MASTER_LOG_FILE and MASTER_LOG_POS act as a bookmark, telling the slave, "Start reading the story from exactly this page and this line."
2.4 Start the Slave
The configuration is set, but the data stream is not yet active. You must manually kick off the replication threads:
Once started, the slave initiates two distinct processes: the I/O Thread (which connects to the master and pulls log data) and the SQL Thread (which executes that data locally). To verify that both are working, check the status:
In the vertical output provided, scroll through and look for these two critical lines:
- Slave_IO_Running: Yes (Confirms the slave is successfully connected to the master)
- Slave_SQL_Running: Yes (Confirms the slave is successfully applying changes to its local database)
Testing the Replication
Once the configuration is complete, it is vital to perform a live "pulse check" to confirm that the data pipeline is flowing correctly. Testing ensures that the network permissions, user privileges, and log positions are all perfectly aligned. To verify the setup, you will perform a "write" operation on the Master and immediately check for its presence on the Slave.
Executing the Test
First, log in to the MySQL command line on your Master server and create a temporary table to act as a test marker.
On the Master:
By executing these commands, the Master writes the "CREATE" and "INSERT" events into its binary log. Almost instantaneously, the Slave's I/O thread should detect these new entries, pull them across the network, and hand them to the SQL thread for execution.
On the Slave:
Interpreting the Results
If the query returns a row with the value 1, congratulations! You have successfully deployed a functional database cluster. This confirms that your MySQL Replication setup is active and handling data transmission in real-time.
What to do if it fails:
- Check the Logs: If the table does not appear, run SHOW SLAVE STATUS\G again and look at the Last_IO_Error or Last_SQL_Error fields. This often provides the exact reason, such as a "Duplicate entry" or "Access denied."
- Verify Firewalls: Ensure that the Master is still reachable from the Slave's IP address.
- Confirm Log Position: Double-check that the MASTER_LOG_POS you entered on the Slave matches the output you saw on the Master earlier.
Hire MySQL Developers Today!
References & Further Reading
Mastering MySQL Replication is an ongoing journey that extends far beyond the initial handshake between two servers. To build a production-grade environment that is truly resilient, you should explore the more advanced architectural patterns and maintenance strategies used by industry experts.
Official Documentation:
Dig deeper into the official manuals for detailed insights into GTID-based replication. Unlike the file-and-position method we used, Global Transaction Identifiers (GTIDs) make failover management much simpler by uniquely identifying every transaction across the entire cluster. You can also find extensive guides on advanced security settings, such as SSL/TLS encryption for data in transit between nodes.
High Availability Strategies:
A simple master-slave setup is just the beginning. Learn how to implement automated failover to ensure zero downtime. This involves using tools like Orchestrator, MHA (Master High Availability), or MySQL InnoDB Cluster to automatically promote a slave to master status if the primary node goes offline.
Replication Formats:
Research the differences between Statement-Based Replication (SBR), Row-Based Replication (RBR), and Mixed-format. Understanding how these logs are structured will help you optimize network bandwidth and ensure data consistency for complex queries.
Monitoring and Health Checks:
Familiarize yourself with monitoring metrics beyond just "Yes/No" statuses. Key indicators like Seconds_Behind_Master, I/O thread latency, and disk I/O on the slave are essential for identifying performance bottlenecks before they impact your users.
Optimization Services:
Database tuning is both an art and a science. Our team specializes in tuning large-scale clusters for peak performance, ensuring that your replication lag remains near zero even under heavy write loads. Whether you need help with sharding, load balancing with ProxySQL, or general performance audits, feel free to contact us to optimize your environment.
Conclusion
Implementing MySQL Replication is a transformative step for any application, moving from a vulnerable single-server setup to a high-availability architecture. By following this guide, you have laid the groundwork for a system that can scale horizontally, protect against data loss, and maintain high performance during analytical processing. However, as your data grows, managing complex replication topologies, optimizing query performance, and ensuring automated failover becomes increasingly intricate.
To truly future-proof your database infrastructure and ensure it remains optimized for peak performance, you may need professional expertise. If you want to scale your operations without the technical headaches, you can Hire MySQL developers from our team who specialize in architectural design and performance tuning.
Ready to elevate your digital product's reliability? Our skilled experts at Zignuts provide end-to-end support for scaling and database optimization. Contact Zignuts today to ensure smooth and reliable performance for your next project.
Shaili Shah
Passionate developer with expertise in building scalable web applications and solving complex problems. Loves exploring new technologies and sharing coding insights.