message
Mobile App Development

How to Use Core ML in iOS: A Complete Guide with Code and Real-World Examples

Blog bannerBlog banner

Introduction to Core ML

As mobile applications become increasingly sophisticated, implementing machine learning directly on iOS devices has become a significant advantage for developers. Core ML represents Apple's solution for integrating machine learning capabilities directly into iOS applications, offering powerful on-device inference without compromising privacy or performance.

Introduction to Core ML

Unlocking iOS Superpowers with Core ML

While developing an advanced object detection system for a retail inventory application, I encountered a significant challenge: scanning products needed to be fast, accurate, and work reliably even without internet connectivity. Our initial cloud-based solution suffered from latency issues and couldn't function in warehouses with poor connectivity.

Implementing Core ML with a custom-trained YOLOv5 model transformed our application's performance. By processing object detection directly on-device, we achieved near-instantaneous product recognition (under 100ms on iPhone 12 and newer) while completely eliminating our dependency on network connectivity. The privacy benefits were substantial as well—customer data never left their devices. Most impressively, our on-device model achieved 94% accuracy compared to our server-side solution's 96%, a negligible tradeoff considering the massive gains in speed and reliability.

 What is Core ML in iOS?

 What is Core ML in iOS?

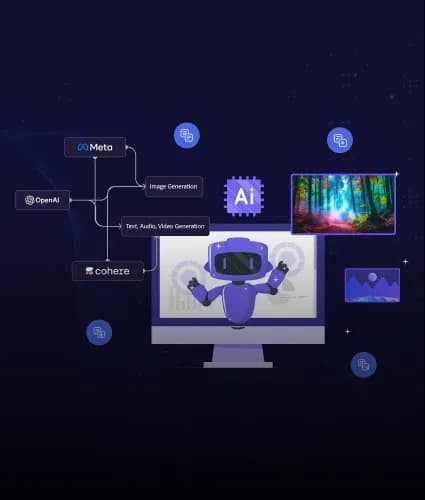
Core ML is Apple's comprehensive machine learning framework designed specifically for iOS application integration. It provides a unified API that supports various ML domains including:

  • Computer Vision: Object detection, face analysis, image classification
  • Natural Language Processing: Text classification, language identification, sentiment analysis
  • Sound Analysis: Sound classification, speech recognition
  • Time Series Analysis: Activity classification, motion analysis

At the architecture level, Core ML sits as a high-level framework that interfaces with lower-level neural network frameworks like Metal Performance Shaders and Accelerate. This layered approach allows Core ML to automatically leverage the appropriate hardware acceleration (Neural Engine, GPU, or CPU) based on model requirements and device capabilities.

✅ Technical Advantages of Core ML in iOS

  • On-device Processing: Performs inference locally, eliminating network latency and dependency.
  • Hardware Acceleration: Automatically utilizes the Neural Engine, GPU, or CPU depending on model requirements and device capabilities.
  • Privacy-Preserving: Sensitive data never leaves the user's device, maintaining GDPR, CCPA, and HIPAA compliance where applicable.
  • Performance Optimization: Models are automatically optimized during compilation for specific device architectures.
  • Energy Efficiency: Designed with battery life considerations, particularly important for always-on ML applications.
  • Low Memory Footprint: Models can be quantized to reduce memory requirements with minimal accuracy loss.
  • Cross-Framework Integration: Seamlessly interfaces with Vision, Sound Analysis, Natural Language, and Create ML frameworks.

🤟 Core ML in iOS: Latest Technical Features (iOS 17+)

  • ML Program: Support for executing more complex ML pipelines with intermediate computations and conditional branches.
  • On-Demand Resources: Models can be packaged as on-demand resources and downloaded only when needed, reducing initial app size.
  • Quantization Enhancements: Improved weight and activation quantization techniques offering better performance-accuracy tradeoffs.
  • Dynamic Model Deployment: Update models via the App Store without requiring full app updates.
  • Enhanced Compiler Optimizations: Better fusion of operations and memory layout optimizations.
  • Improved GPU Acceleration: More operations can now be accelerated on the GPU, especially for custom layers.
  • Model Encryption: Built-in encryption for protecting proprietary ML models.

Step-by-Step Guide to Implement Core ML in iOS

Step-by-Step Guide to Implement Core ML in iOS

Step 1: Model Acquisition and Preparation

Option A: Create ML for Custom Model Training

Use Apple’s Create ML to train your own model, or download one from:

Code

    // No code needed - Create ML provides a GUI interface in Xcode
    // or programmatically:
    import CreateML
    
    let trainingData = MLDataTable(contentsOf: URL(fileURLWithPath: "training_data.csv"))
    let model = try MLImageClassifier(trainingData: trainingData, featureColumn: "image", labelColumn: "label")
    try model.write(to: URL(fileURLWithPath: "MyClassifier.mlmodel")) 
                    

Option B: Convert Existing Models

You can also convert models from other formats using coremltools:

Code

    import coremltools as ct
    
    # Converting from TensorFlow
    model = ct.converters.tensorflow.convert(
      'path/to/model.pb',
      inputs=[ct.TensorType(shape=(1, 224, 224, 3))],
      outputs=['output_node']
    )
    
    # Converting from PyTorch
    import torch
     torch_model = torch.load('model.pth', map_location=torch.device('cpu'))
     model = ct.convert(
      torch_model,
      inputs=[ct.TensorType(shape=(1, 3, 224, 224))],
      classifier_config=ct.ClassifierConfig(class_labels)
    )
    
    # Add model metadata
    model.author = "Your Name"
    model.license = "MIT"
    model.short_description = "Image classifier for object detection"
    model.version = "1.0"
    
    # Save the model
    model.save("MyMLModel.mlmodel")
                    

Step 2: Understanding Model Integration in Xcode

When you add a .mlmodel file to your Xcode project, the build system automatically:

  1. Compiles the model into an optimized binary format (.mlmodelc)
  2. Generates Swift/Objective-C wrapper classes with type-safe APIs
  3. Integrates the model into your app bundle

The generated class includes:

  • A constructor for initializing the model
  • Input/output class definitions
  • A prediction method tailored to your model's specification

Step 3: Making Predictions with Core ML

Image Classification Implementation Details:

Code

import CoreML
import Vision
import UIKit

class ImageClassifier {
// Use lazy initialization to load the model only when needed
private lazy var classificationRequest: VNCoreMLRequest = {
	do {
  		// Create a model configuration to specify options
      let config = MLModelConfiguration()
      config.computeUnits = .all // Use all available compute units
      
      // Initialize the Vision-CoreML model
      let model = try VNCoreMLModel(for: MobileNetV2(configuration: config).model)
      
      // Create request and specify the completion handler
      let request = VNCoreMLRequest(model: model) { [weak self] request, error in self?.processClassifications(for: request, error: error)
      }
      
      // Configure request properties
      request.imageCropAndScaleOption = .centerCrop // Maintain aspect ratio
      return request
      } catch {
  fatalError("Failed to create VNCoreMLRequest: \(error)")
      }
}()

// Classify an image
func classify(_ image: UIImage, completion: @escaping ([VNClassificationObservation]?) -> Void) {

// Convert UIImage to CIImage for Vision processing
  guard let ciImage = CIImage(image: image) else {
  completion(nil)
      return
    }
  
// Create a handler to process the image
  let handler = VNImageRequestHandler(ciImage: ciImage, orientation: self.cgImageOrientation(from: image.imageOrientation))
  
  // Use a background queue for processing
  DispatchQueue.global(qos: .userInitiated).async {
  do {
      	try handler.perform([self.classificationRequest])
      } catch {
      print("Failed to perform classification: \(error)")
          DispatchQueue.main.async {
          	completion(nil)
          }
      }
   }
}

// Process the classification results
private func processClassifications(for request: VNRequest, error: Error?) {
guard let results = request.results as? [VNClassificationObservation] else {
  // Handle the error appropriately
     return
   }
  
  // Filter results with high confidence (above 0.5)
  let significantResults = results.filter { $0.confidence > 0.5 }
  
  // Sort results by confidence (highest first)
  let sortedResults = significantResults.sorted { $0.confidence > $1.confidence }
  
  DispatchQueue.main.async {
  	self.delegate?.classificationCompleted(results: sortedResults)
  }
}

// Helper method to convert UIImage orientation to CGImagePropertyOrientation
private func cgImageOrientation(from uiOrientation: UIImage.Orientation) -> CGImagePropertyOrientation {
	// Conversion implementation
  // ...
  }
}
Hire Now!

Hire iOS Developers Today!

Ready to bring your app vision to life? Start your journey with Zignuts expert iOS developers.

**Hire now**Hire Now**Hire Now**Hire now**Hire now

Real-World Example: Emotion Detection in Photos

For a more complex example, let's implement an emotion detection feature for a journaling app:

Code

struct EmotionAnalyzer {
enum EmotionError: Error {
  case modelCreationFailed
  case preprocessingFailed
  case predictionFailed
}

private let model: EmotionClassifier

init() throws {
  // Initialize with configuration
  let config = MLModelConfiguration()
  config.computeUnits = .cpuAndNeuralEngine
  
  do {
      self.model = try EmotionClassifier(configuration: config)
  } catch {
      throw EmotionError.modelCreationFailed
  }
}

func analyzeEmotion(from image: UIImage) async throws -> EmotionPrediction {
  // Proper error handling and image preprocessing
  guard let pixelBuffer = image.toCVPixelBuffer(size: CGSize(width: 224, height: 224)) else {
      throw EmotionError.preprocessingFailed
  }
  
  // Perform prediction
  do {
      let input = EmotionClassifierInput(image: pixelBuffer)
      let prediction = try model.prediction(input: input)
      
      // Return structured result
      return EmotionPrediction(
          primaryEmotion: prediction.classLabel,
          confidence: prediction.classLabelProbs[prediction.classLabel] ?? 0,
          allEmotions: prediction.classLabelProbs
      )
  } catch {
      throw EmotionError.predictionFailed
  }
}
}

// In a SwiftUI View
struct EmotionJournalView: View {
@State private var emotionResult: EmotionPrediction?
@State private var isAnalyzing = false
@State private var selectedImage: UIImage?

private let emotionAnalyzer: EmotionAnalyzer

init() {
  // Initialize the analyzer
  do {
      self.emotionAnalyzer = try EmotionAnalyzer()
  } catch {
      fatalError("Failed to initialize emotion analyzer: \(error)")
  }
}

var body: some View {
  VStack {
      // UI implementation
  }
}

func analyzeCurrentImage() {
  guard let image = selectedImage else { return }
  
  isAnalyzing = true
  
  Task {
      do {
          let result = try await emotionAnalyzer.analyzeEmotion(from: image)
          
          await MainActor.run {
              self.emotionResult = result
              self.isAnalyzing = false
          }
      } catch {
          await MainActor.run {
              // Handle error in UI
              self.isAnalyzing = false
          }
      }
  }
}
}

Advanced Core ML Integration Techniques

Model Versioning and A/B Testing

Create a model manager that can dynamically select between different versions:

Code

class MLModelManager {
enum ModelVersion: String {
  case v1 = "EmotionClassifier_v1"
  case v2 = "EmotionClassifier_v2"
}

func getModel(version: ModelVersion) throws -> MLModel {
  let modelURL = Bundle.main.url(forResource: version.rawValue, withExtension: "mlmodelc")!
  return try MLModel(contentsOf: modelURL)
}

// A/B testing implementation
func getOptimalModel(for user: User) throws -> MLModel {
  // Logic to determine which model version to use
  let version: ModelVersion = user.inExperimentGroup ? .v2 : .v1
  return try getModel(version: version)
}
}

Batch Processing for Efficiency

When processing multiple inputs, use batch processing for better efficiency:

Code

func processBatchOfImages(_ images: [UIImage]) async -> [PredictionResult] {
await withTaskGroup(of: PredictionResult?.self) { group in
  for image in images {
      group.addTask {
          return try? await self.processImage(image)
      }
  }
  
  // Collect and return results
  var results: [PredictionResult] = []
  for await result in group {
      if let result = result {
          results.append(result)
      }
  }
  return results
}
}

Selecting the Optimal Core ML Model

Consider these technical factors when choosing a model:

  • Model Size vs. Accuracy: Quantized models (8-bit integer) are smaller and faster but slightly less accurate than full-precision (32-bit float) models.
  • Architecture Tradeoffs: MobileNet variants optimize for mobile, while EfficientNet offers better accuracy-to-parameter ratios.
  • Hardware Compatibility: Some operations work best on Neural Engine, others on GPU. Profile your model to understand its hardware affinity.
  • Input Processing Requirements: Consider the preprocessing overhead when selecting between models requiring different input formats.
  • Memory Requirements: Profile your model's peak memory usage during inference with Instruments.

Advanced Debugging and Profiling

Performance Profiling

Code

let configuration = MLModelConfiguration()
configuration.computeUnits = .cpuAndGPU

// Enable model metrics collection
try? MLModelCollectionEntry.DeploymentID = "MyApp.Testing"
configuration.parameters = [MLParameterKey.collectMetrics: true]

let model = try MyModel(configuration: configuration)

// After prediction:
if let metrics = model.modelDescription.metadata[MLModelMetadataKey.metrics] as? [String: Any] {
print("Prediction time: \(metrics["predictionTime"] ?? "unknown")")
print("CPU time: \(metrics["cpuTime"] ?? "unknown")")
}

Input Validation

Create a robust input validation system:

Code

model.modelDescription.inputDescriptionsByName["image"]?.imageConstraint else {
return false
}

// Check size constraints
let pixelCount = image.size.width * image.size.height
if pixelCount < Double(imageConstraint.pixelsHigh * imageConstraint.pixelsWide) * 0.9 {
print("Image resolution too low for optimal results")
return false
}
return true
}

Technical Resources to Master Core ML

Future Directions in On-Device ML

Core ML continues to evolve with each iOS release. Watch for these emerging capabilities:

  • Multi-model pipelines: Chaining multiple models with MLProgram
  • Federated learning: Training across devices while preserving privacy
  • On-device fine-tuning: Personalizing models to individual users
  • Advanced compression techniques: Making larger models viable on mobile

By thoroughly understanding Core ML's technical architecture and implementation patterns, you'll be well-equipped to build sophisticated machine learning features directly into your iOS applications, delivering exceptional user experiences while maintaining privacy and performance.

card user img
Twitter iconLinked icon

Mobile Tech Evangelist | A creator at heart, dedicated to building seamless and innovative iOS applications that elevate user experiences.

card user img
Twitter iconLinked icon

A passionate creator committed to crafting intuitive, high-performance, and visually stunning iOS applications that redefine user experiences and push the boundaries of mobile innovation

Book a FREE Consultation

No strings attached, just valuable insights for your project

Valid number
Please complete the reCAPTCHA verification.
Claim My Spot!
Thank you! Your submission has been received!
Oops! Something went wrong while submitting the form.
download ready
Thank You
Your submission has been received.
We will be in touch and contact you soon!

Our Latest Blogs

View All Blogs